
Audio Hijack — Mac download
Download (26 MB) Earlier builds
Ticked
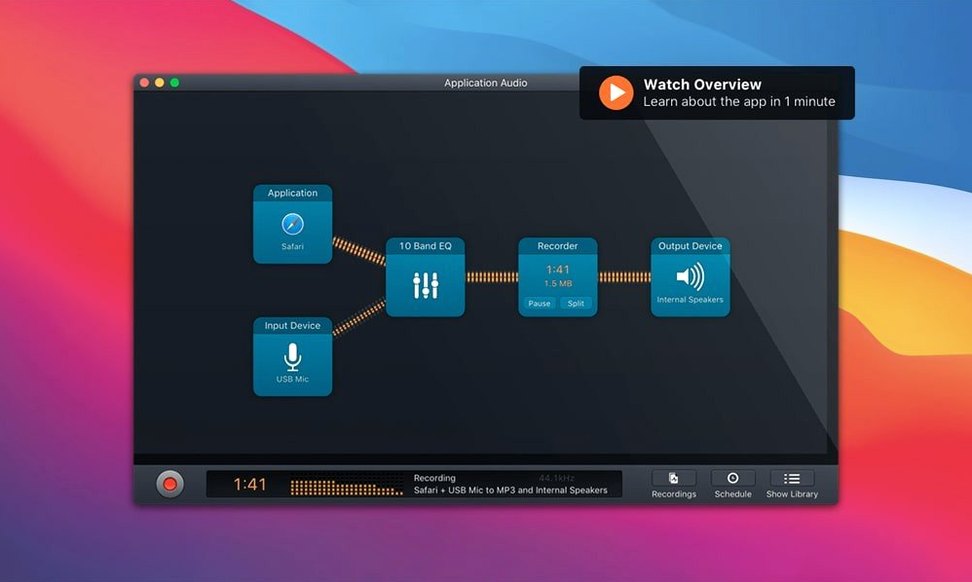
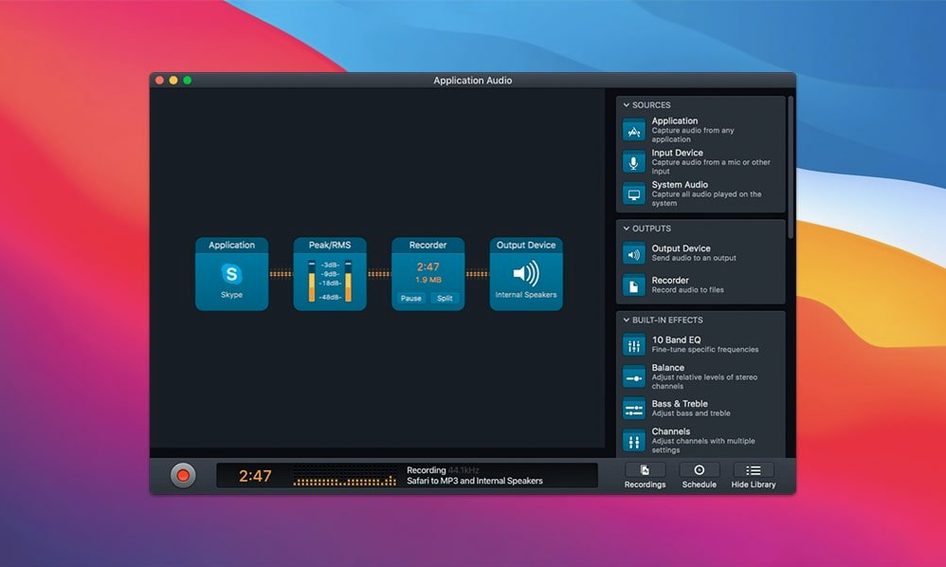
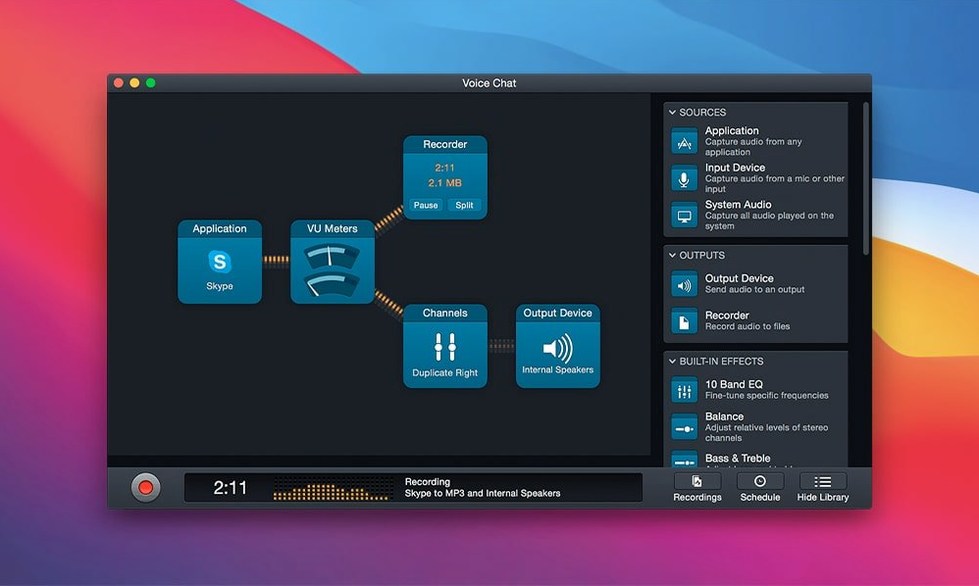
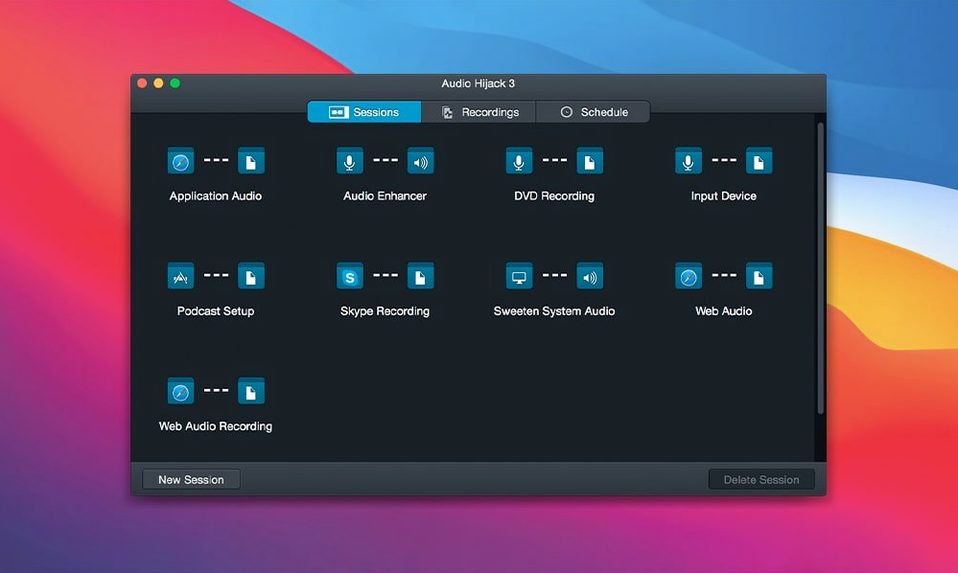
Every session in Audio Hijack 4 starts with a template — sixteen are included in version 4.6.0. If the app is new to you, these five blocks are the right place to begin.
- Record a VoIP call. The VoIP Call template captures both sides of a Skype or FaceTime conversation. Adjust individual gain sliders before you hit the red button.
- Digitise a vinyl record. Connect a USB turntable, select it as the input device in the Vinyl Ripper template, and set the silence monitor to split tracks automatically.
- Capture a live radio stream. Choose Safari as the source, set a timer block to stop recording after the show ends, and save directly to an MP3 file on your desktop.
- Combine two sources. Drag a microphone and an application source into a single session. Add a recorder block at the end and you get a mixed file with no extra editing.
- Run a transcription. Patch a recording through the Transcribe block — version 4.6.0 ships with a Recommended model and an updated Whisper.cpp backend for faster results.
Each block is reusable and can be reordered. Start with the templates, then swap in the Voice Changer, EQ or a limiter once the basics feel comfortable.
Hidden shortcuts that save time
Most people drag blocks around and never touch the keyboard. A few keystrokes speed things up.
- Space bar to start or stop a session. Works when the main window is in focus. No mouse needed.
- Command-D duplicates the selected block. Quick way to add a second recorder writing to a different format.
- Option-click a volume slider resets it to 0 dB. Handy after a guest's mic clips and you've pushed the gain down too far.
- Drag a block onto an existing connection line inserts it between two blocks instead of at the end of the chain. Saves re-wiring.
- Command-S enters the session title, then Tab to the output folder field, then Return. Three keystrokes and you're recording.
The Transcribe block in version 4.6.0 also responds to Command-Shift-T, which exports the last transcription as a plain text file to the same folder as the recording.
Worked example: capture a remote interview with separate tracks
Scenario: you interview someone on a VoIP call and want your voice on one channel, theirs on another, for editing later.
- Open the VoIP Call template.
- Delete the single recorder block. Add two Recorder blocks side by side.
- Route the application source into the first recorder. Set it to Left channel only in the block inspector.
- Route the microphone source into the second recorder. Set it to Right channel only.
- Add a Denoise block before your own mic recorder. Dial it to about 30% reduction — enough to kill room hum without hollowing out your voice.
- Add a Declick block before the remote caller's recorder. VoIP packet loss sometimes produces clicks.
- Set both recorders to FLAC. Lossless files give you headroom for post-processing without generation loss.
- Name the session with the guest and date. Hit record.
After the call, you have two mono FLAC files. Import them into any editor as left and right tracks of a stereo file, or keep them separate for independent EQ and compression passes.
Recording every system beep instead of just the app
- Recording the system audio channel instead of the specific application. You get every ping, alert and YouTube autoplay in the file. Always choose the app as the source, not "System Audio."
- Forgetting to un-mute the monitor. The session runs, the meters move, the file is empty. Check the speaker icon in each source block — it defaults to muted on new sessions.
- Stacking effects without gain staging. Running Denoise, EQ and a compressor in sequence can push levels into clipping. Insert a Volume block between effects and watch the peak meter at the final recorder.
- Leaving the silence monitor threshold at zero. Split-by-silence works for vinyl rips, but on a quiet podcast guest it chops the conversation into fragments. Raise the threshold to -40 dB or turn it off entirely.
- Expecting the Transcribe block to punctuate perfectly. The Whisper.cpp backend in version 4.6.0 is fast, but it outputs raw text. Run the result through a quick formatting pass before publishing. The Recommended model balances speed and accuracy — switching to a larger model helps with accented speech but runs slower.
- Not testing the full chain before a live call. A thirty-second test recording reveals routing errors, missing blocks and level issues. Do it every time.
- Adds support for MacOS 27 (Golden Gate).
- Adds a Recommended transcription model to the Transcribe block.
- Updates the Whisper.cpp backend from 1.7.4 to 1.9.2.
- macOS 14.4 or later
- Intel or Apple Silicon Mac
Questions the team asks
Yes. Add the microphone as an input source in any session and route it to a recorder block.
Yes. Audio Hijack 4.6.0 runs on both Intel and Apple Silicon Macs with macOS 14.4 or later.
Audio Hijack encodes to MP3, AAC, Apple Lossless, AIFF, WAV and FLAC via the recorder block settings.







Comments 0
Sign in or create an account to add a comment.
No comments yet. They go up after moderation.