
Screen Studio — Mac download
Download (715 MB) Earlier builds
Ticked
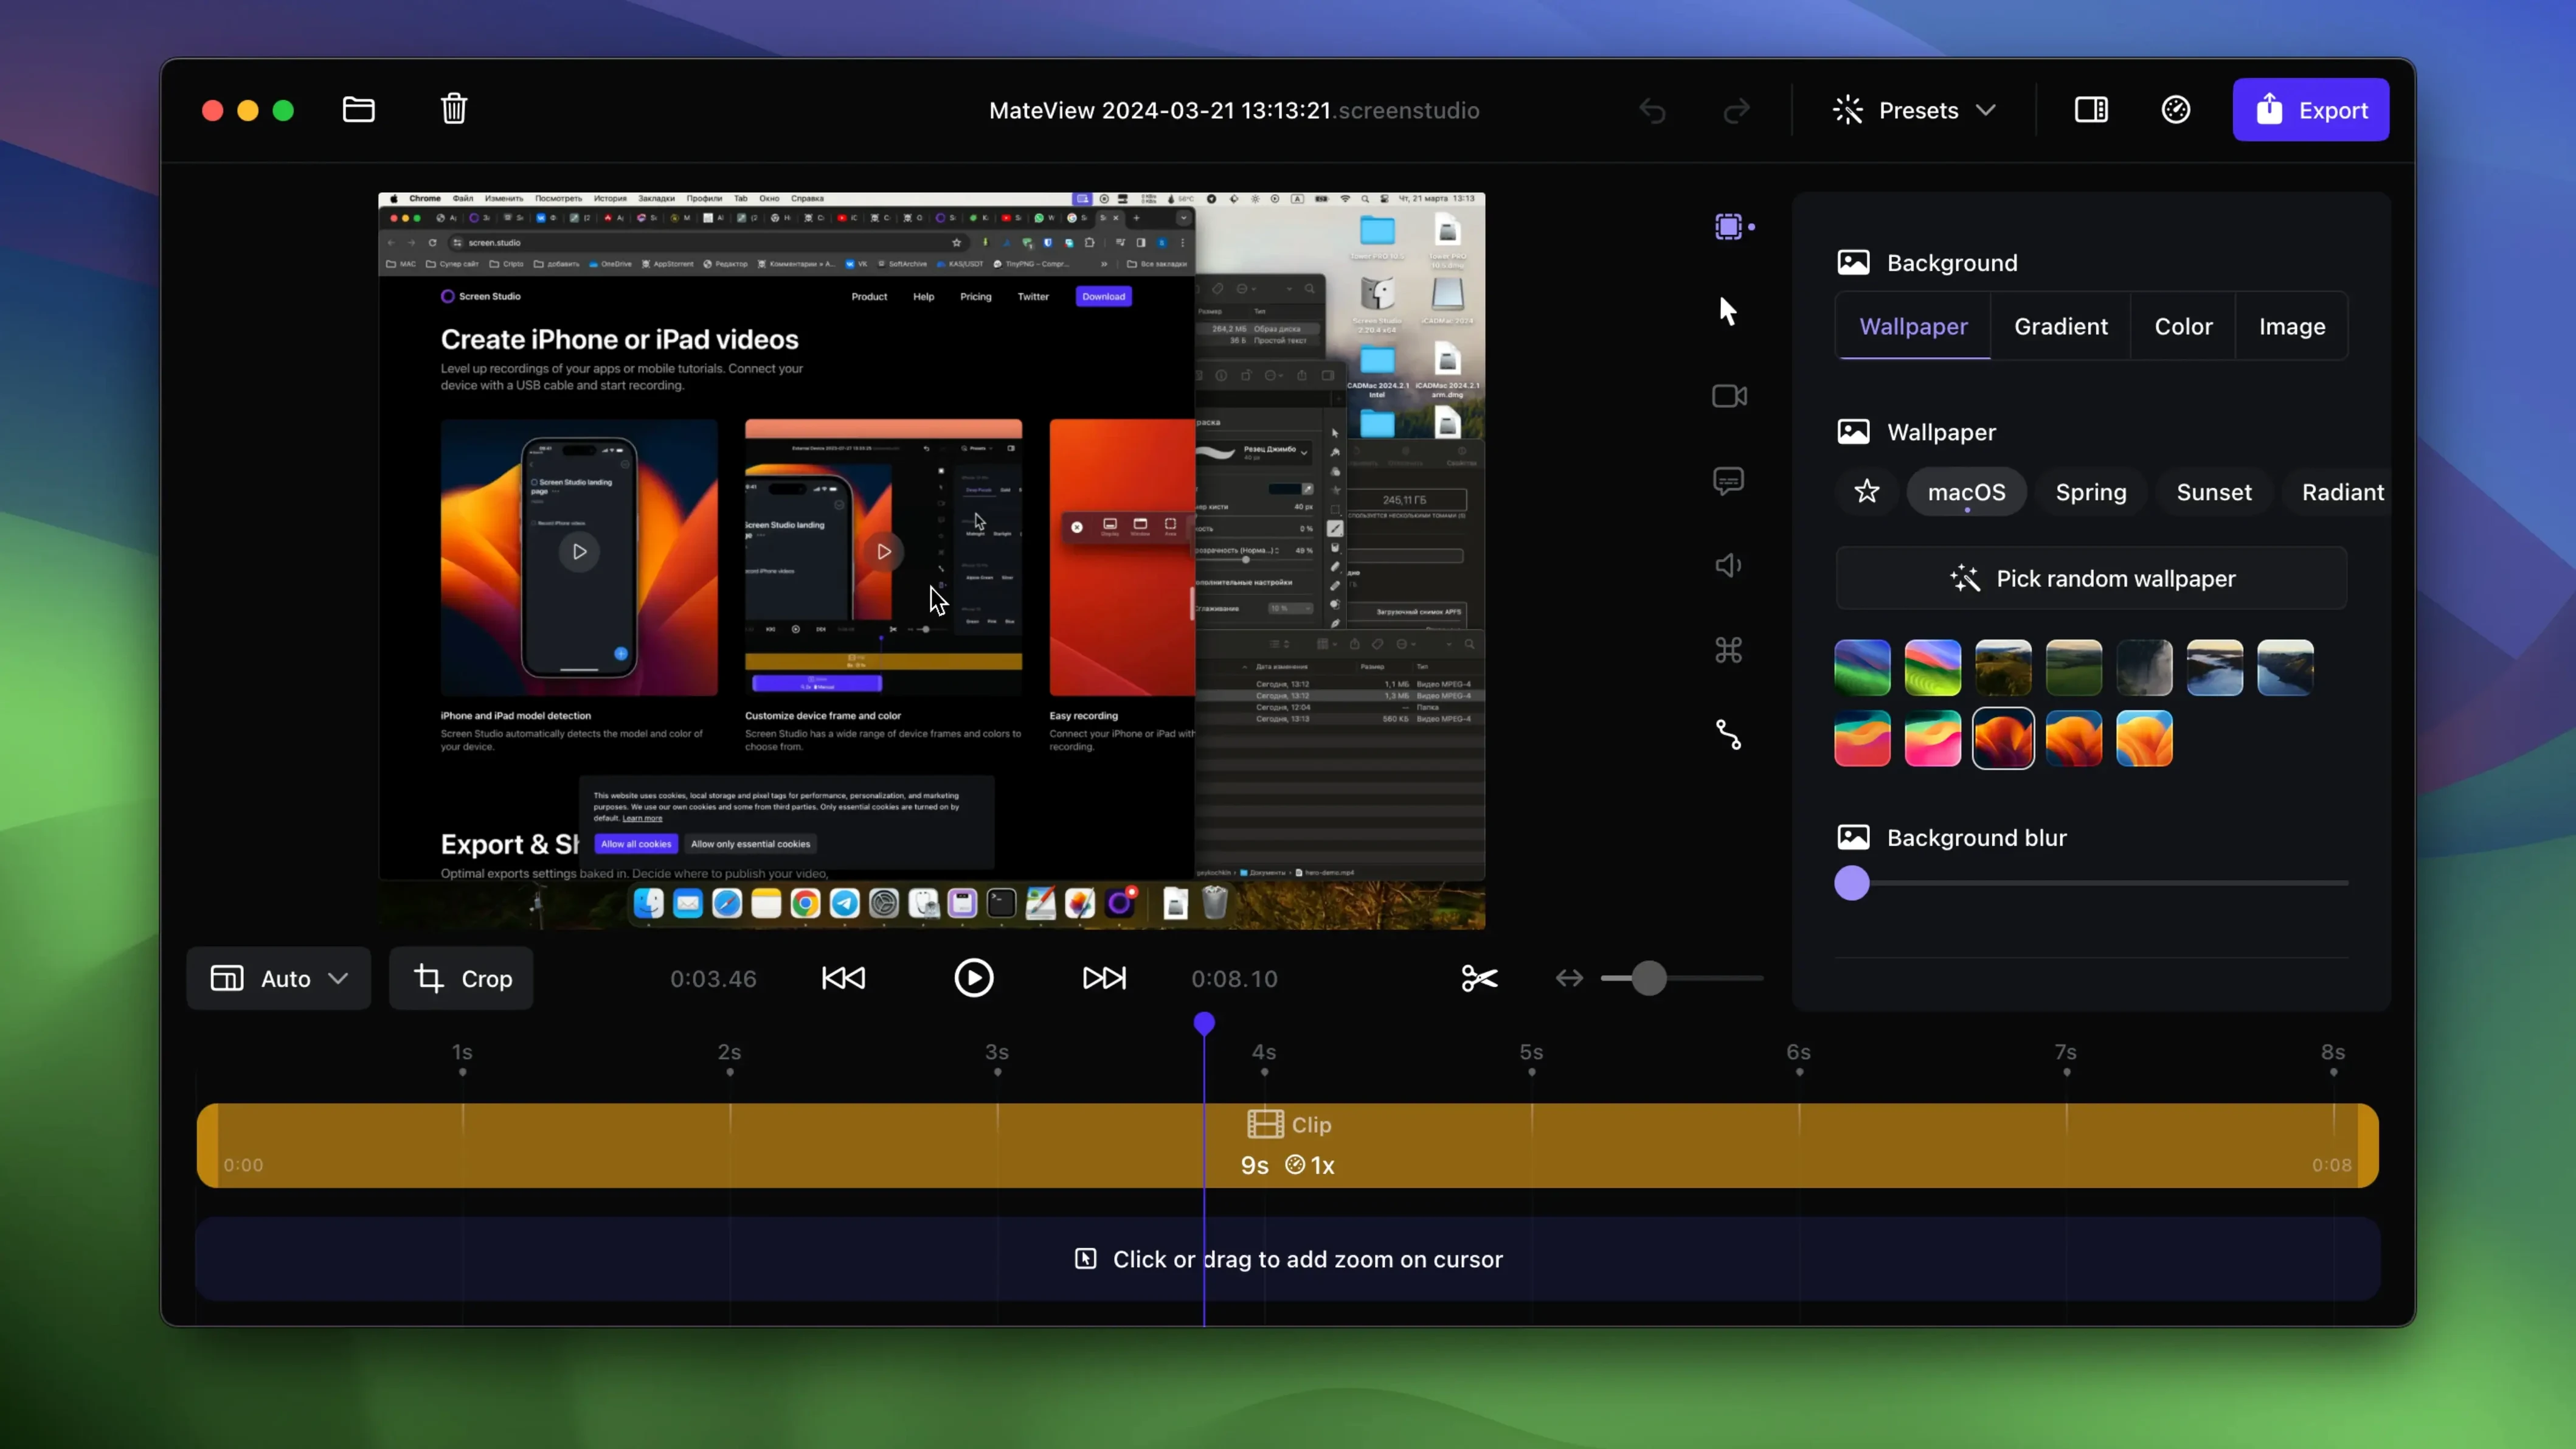
It hides the static cursor after 3 seconds of inactivity. That is the level of detail Screen Studio operates at. It is a screen recorder built for people who want a polished result without spending hours on manual keyframes.
Highlight UI elements in demos and export quick GIFs
- Recording product demos where you need to highlight specific UI elements
- Creating short GIF exports for documentation or social media
- Recording a connected iPhone or iPad screen via USB, with the device frame detected automatically
- Showing keyboard shortcuts on screen as you press them
- Generating a local transcript without sending audio to a server
Choose system audio per app and edit zooms after recording
- Manual zoom selection happens in the editor, not during recording
- System audio capture can target all apps or only specific ones
- Zoom changes are edited by dragging them onto the timeline
- Webcam and microphone can be recorded alongside the screen
- Requires macOS 13 or later
Runs natively on Intel and Apple Silicon, no Rosetta needed
Does it work on Intel Macs as well as Apple Silicon? Yes. The build runs natively on both architectures. No Rosetta translation needed on either side.
Can I record without the automatic zoom effects? Yes. You can disable automatic motion entirely and add zooms manually afterwards. The editor gives you manual control over every zoom change.
Will it record system audio from a single app without capturing notifications? Yes. The audio capture lets you pick specific apps. If you only select Safari, it records Safari and nothing else.
Does the transcript feature need an internet connection? No. Transcription runs locally on your Mac. The audio stays on your machine.
Can I export a vertical video for Instagram or TikTok? Yes. The export tool handles vertical scaling and adjusts framing automatically for that format.
Fix choppy cursor exports by bumping the frame rate to 60 fps
Cursor effects look choppy after export. Check your export frame rate. The app can export up to 60 fps. If the project settings default to a lower rate, bump it up before exporting.
Connected iPhone does not appear in the device list. Make sure the cable is a USB data cable, not a charge-only cable. Also confirm the iPhone is unlocked and trusted the Mac when prompted. If the prompt did not appear, disconnect and reconnect.
System audio capture is silent despite selecting the right app. Some apps route audio in ways that macOS restricts. Try switching from single-app capture to all-apps capture as a test. If that works, the issue is with that specific app's audio routing.
Background removal on the selfie overlay looks rough. This depends heavily on lighting. A plain, evenly lit wall behind you gives a much cleaner result than a busy background. If the room is dim, add a light source facing you.
Export takes longer than expected. 4K at 60 fps with a selfie overlay and transcript generation is a heavy render. Drop the resolution to 1080p for a faster test export, then switch back for the final version.
Workflow: recording a product demo with device overlay
Say you need a short demo showing a new feature in your iOS app, with your face in the corner and the iPhone screen framed cleanly.
- Connect the iPhone to your Mac with a USB data cable. Unlock the phone and trust the Mac.
- Open Screen Studio. In the recording panel, select the iPhone as the source. The app detects the model and colour automatically and draws the device frame.
- Enable the webcam for a selfie overlay. Position it in a bottom corner. The app reduces its size automatically so it does not compete with the main screen.
- Enable Show keyboard shortcuts if you plan to press any on the Mac. For an iOS demo, you can skip this.
- Enable Hide desktop icons to keep the Mac desktop clean if any part of it will be visible.
- Hit record. Walk through the feature on the iPhone at a steady pace. Screen Studio tracks your taps and applies zoom automatically.
- Stop the recording. The editor opens. Drag any zoom changes you want to adjust onto the timeline. Trim the start and end to remove setup fumbling.
- Use Normalize voice volume to even out your narration. Enable noise removal if there was background hum.
- Set the export to vertical, 4K, 60 fps. Export the video.
- Copy the finished file to the clipboard and paste it directly into Slack or your documentation tool.
The whole process, from plugging in the phone to a finished link-ready clip, takes under ten minutes once you learn the steps.
- macOS 13 or later
- Apple Silicon or Intel




Comments 0
Sign in or create an account to add a comment.
No comments yet. They go up after moderation.